
You start with the front, because that is the part people see. It comes up well. Then you pull the shirt along the board to reach a sleeve, the warm front folds over the edge, and a fresh line appears across the chest that was not there a minute ago. You iron that out and turn to the collar. Now the sleeve you just finished slides off the board and lands on itself.
Nothing was wrong with the iron. The shirt was moved while it was still warm and damp, in an order that made you move it again and again.
To iron a shirt without adding new creases, go from the small parts to the big ones: collar, cuffs, sleeves, yoke, back, then the two fronts. Keep the cloth slightly damp, stay within the heat the care label allows, and let the shirt cool on a hanger before you fold it or put it away.
That order is reasoned advice, not a rule. Guides differ: some do the yoke with the collar, some leave the back until last, and some people iron the back between the two fronts. The ones we read share two points: start at the collar, and leave the large panels until after the sleeves. Below is the reason for each step, so you can change any that does not suit your shirt.
Why a shirt picks up new creases while you iron it
Cotton is mostly cellulose, long chains that cling to each other through weak bonds. As Mark Lorch, a professor of science communication and chemistry at the University of Hull, explains, water slips between those chains and breaks the bonds so the chains can slide. Heat and moisture together do this quickly, and the press of the iron pushes the chains to lie flat. When the cloth dries, it keeps the shape it has been given.
So a warm, damp shirt can be shaped, and it has no idea which shape you want. It takes a careless fold as readily as a flat press. Everything about the order follows from that. Small, fiddly parts get finished while the rest of the shirt is still crumpled and moving it does no harm. The big panels wait until the end because they are the parts you keep sliding along the board.
Should you iron a shirt damp or dry?
Damp. A bone-dry shirt gives the iron little to work with, so use steam or spray it lightly. A dripping one just makes you spend your time drying it. In the monsoon, a shirt that has been slow to dry on the line may already be about right.
A few things to settle before the iron touches cloth:
- Read the dots on the care tag. They set the most heat the shirt can take, and a cross means do not iron at all. Our care label guide explains each one.
- Fill the iron the way its manual says. Guides disagree on tap water against distilled, and much of India has hard tap water, so your own iron's maker is the one to follow.
- Take out any collar stays, and undo every button, including the cuffs.
How to iron a shirt, step by step
1. Collar
Lay it flat with the underside up, pull it taut with your free hand, and iron from each point towards the middle, so any slack ends up in the centre and not in a fold at the tip. Turn it over and do the top the same way. It is small and stiff and sits clear of everything else, so nothing gets disturbed by doing it now.
If a collar still comes out rippled, stop and look before you try again. Many collars have a stiffening layer held in with heat. On a Reddit laundry thread about a collar that kept getting worse, one reply blamed too hot an iron on that layer, and said a cooler iron with steam might help but would not fix it. More ironing does not repair that damage. On a difficult collar that is still sound, press instead of sliding: wet the cloth, pull it taut, set the iron down, lift it, and repeat. A sliding iron can push the cloth into a wrinkle.
2. Cuffs
Open each one out flat and iron the inside, then the outside, working around the buttons. A cuff is a stiff double layer that takes some handling, so do it while the sleeve is still a loose tube you do not mind crumpling.
3. Sleeves, and a decision
Sleeves come before the body because they can hang over the side while you do the body. Do it the other way round and you drag the finished body across the board to reach them.
First decide whether you want a crease. The press-wala way lays the sleeve with its seam along the bottom edge and presses a sharp line from shoulder to cuff. That looks right on a formal shirt or a uniform. The other way, which one Reddit poster learned on their father's shirts, puts the seam in the middle of the sleeve, irons the flat part, then shifts it to catch the edges. There is no line, it takes longer, and it suits a soft or casual shirt. If the sleeve already has an old crease, follow it, or you end up with two.
Either way, go easy on the seam itself. On a poly-cotton shirt, a slightly too hot iron can leave a seam shiny, so keep it on the underside if you can.
4. Yoke
This is the double band across the shoulders at the back. Slip one shoulder over the narrow end of the board and press towards the centre, then swap. On a table, just lay it flat. Doing it now lets you press the back up to a clean edge, though this is the step you can move most freely.
5. Back
Lay it across the board and work from the yoke down, sliding the shirt along as you go. Guides that leave the back until last are not wrong, but whatever gets ironed last gets moved least, and the fronts are what people look at.
6. Fronts
Do the buttonhole side first, since it lies flat. On the button side, use the tip of the iron between the buttons and go around them, not over them. Then hang the shirt straight away and do up the top button, so the collar and fronts settle where they should be.
What puts new creases back
If your shirt still comes out with lines on it, the cause is usually something you can see happening at the board.
| What happened | What you see | What to change |
|---|---|---|
| Ironed on bone-dry cloth | Creases soften but do not go | Spray or steam first |
| Moved a section while warm | A new line across a finished part | Hold the shirt by the part not yet ironed |
| Ironed over a fold | A sharp line at a sleeve or collar point | Smooth it flat by hand before the iron arrives |
| Pressed hard over a seam | A ridge or a shiny strip | Iron up to the seam; go inside out on dark cloth |
| Folded or hung on a chair while warm | Creases where it was folded | Let it cool and dry on a hanger first |
The last row can undo a good job. A shirt folded while still warm and damp dries with the fold in it. In humid weather it takes longer to dry, so give it longer before it goes in the cupboard.
Ironing a shirt without a proper board
The order needs a firm, padded surface that stays still. On a mattress the iron sinks and the shirt never gets a proper press. A table is firmer but needs protection, as our guide to ironing without a board explains.

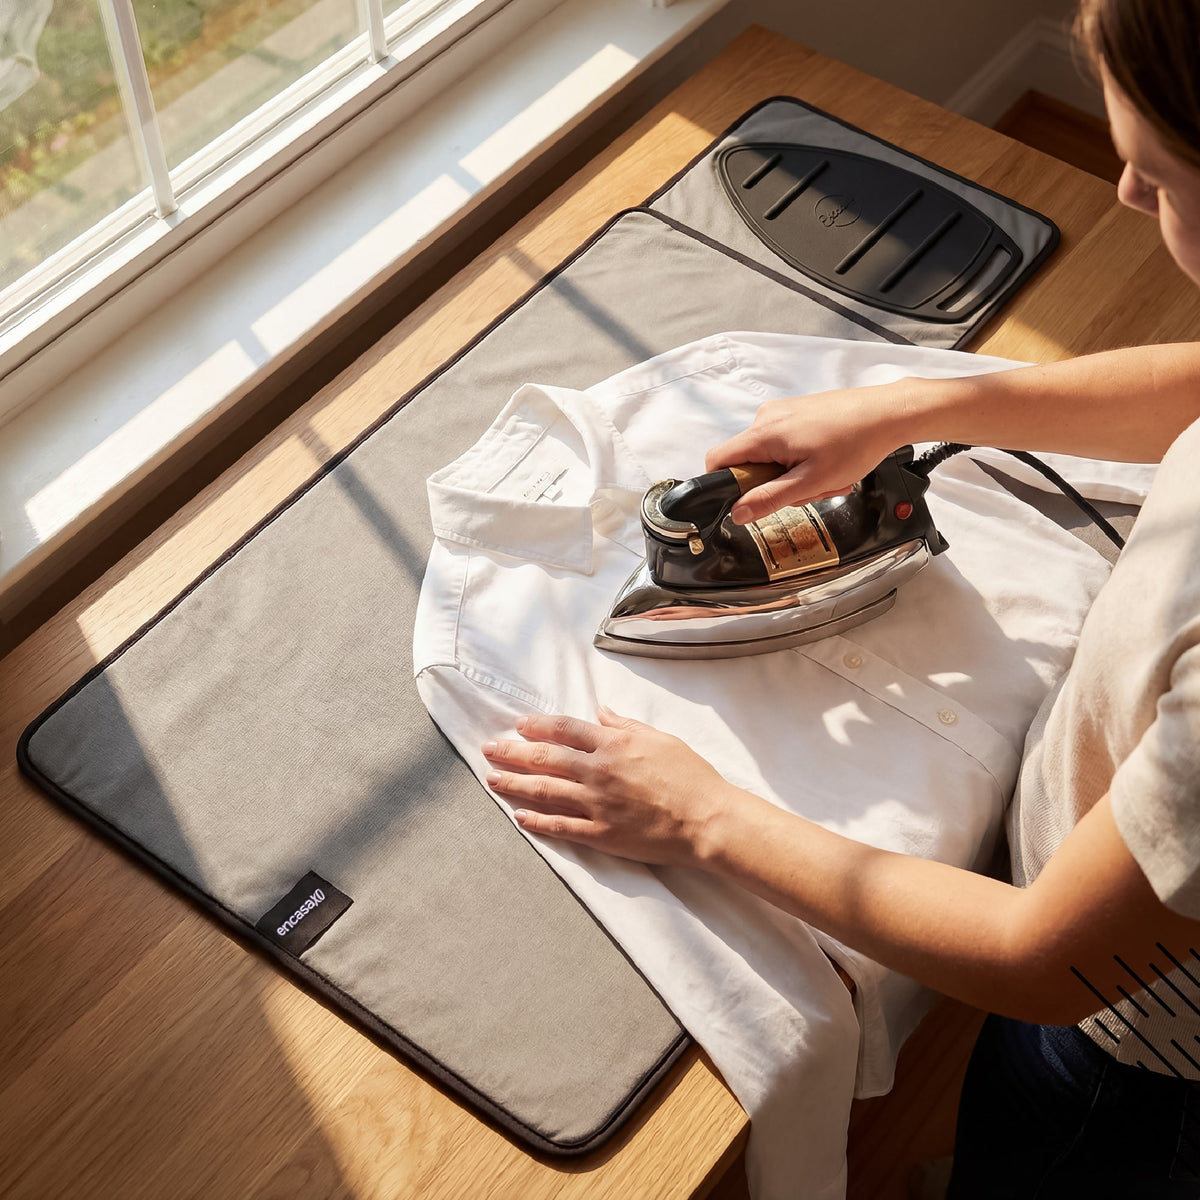
Say you press a shirt or two a day on the dining table, over a folded sheet. The sheet slides and bunches, and each ruck ends up pressed into the shirt. A padded mat with a grippy back holds still instead, and the size depends on your table. Measure the clear space first. On a small table, the 70 x 50 cm size of this anti-slip ironing mat (₹999, with a small flap for the iron rest) takes the shirt a section at a time, with the rest hanging over the edge. With more room, the 120 x 70 cm size (₹1,299) holds the whole body of the shirt at once. Other colours in the mat range do not all have the large in stock, so check before you settle on one.
Turning a sleeve over also means putting a hot iron down for a moment. The mat comes with its own rest. If you stay with the sheet, a silicone iron rest pad at ₹309 gives the iron a place to stand.
When the board itself adds the creases

If the waffle pattern of the mesh shows on dark shirts, or the cover shifts under the iron, suspect the cover first. Our guide to replacing a cover lists the other signs. A padded cotton cover such as this beige scroll-print one, ₹759 to ₹999 by size, usually costs less than changing the board. Measure first with the size guide, then pick a print in that size from the cover range.
How to iron trousers and other clothes
The same rule carries over: small parts first, big panels last, nothing moved while warm.
For trousers, pull the pockets out and press them first, then the waistband over the narrow end of the board. Lay the legs together with the seams lined up and press one leg at a time, inner side then outer. As with sleeves, follow an existing crease.
For a kurta or a blouse, start with the neckline and the sleeves, then do the body. A long kurta slides along the board more than a shirt does, so keep the finished end off the floor.
Common questions
Do you iron a shirt inside out?
Not usually, but it helps hide shine on dark cloth. It will not save you from too much heat, because the heat is the cause whichever side faces up. On white and light shirts, the right side is fine, and you can see the creases better.
What iron setting should I use for a cotton or poly-cotton shirt?
Whatever the tag allows, and no higher. A pure cotton shirt usually has a higher ceiling than a poly-cotton one. If the tag is gone and you are not sure what the cloth is, start on a low setting, try it inside the hem, and move up only if the creases stay.
Do I need a steam iron to iron a shirt well?
No, though it makes collars easier. A dry iron and a spray bottle can do the job on a cotton shirt if you keep spraying as you go.
How do I stop a shirt creasing again after ironing?
Give it room on the rail, so other clothes do not press against it. If you must pack or fold it, wait until it feels cool and fully dry, and fold along as few lines as you can.
Encasa XO is our own brand, and the mats, covers and rest pad named here are ours.


Leave a comment
This site is protected by hCaptcha and the hCaptcha Privacy Policy and Terms of Service apply.